Intro:
Learn about the cultural wear and traditions of the Native American by creating these
lovely, personalized headbands. This terrific activity promotes creativity and fine motor
skills, as well as a valuable lesson on the culture on the Native Americans.
Set Up Ideas:
Provide a wide selection of materials for children to use in decorating their headbands.
Encourage creative self-expression and use of a variety of materials.
Let’s Get Started:
To make these lovely headbands, you'll need to gather 12" x 18" white construction paper,
colored pencils and construction paper in red, yellow and orange. Additionally, have
crayons, markers, sequins and other collage materials on hand so that children can
personalize their headbands.
Tips and Tricks:
Have plenty of decorative supplies on hand so that children can express their creativity. It
may be a good idea to show them some examples and discuss the patterns and items used
in real Native American headgear.
Follow up Activity:
For more Native American studies and crafts, use our air-drying clay to make and
decorate simple clay pottery.
This activity can provide a great lesson on not only history, but respect and sensitivity
toward other cultures. Creating and wearing headbands inspired by Native artworks
gives children a chance to think about history and culture from the unique perspective of
the Native Americans.
Steps:
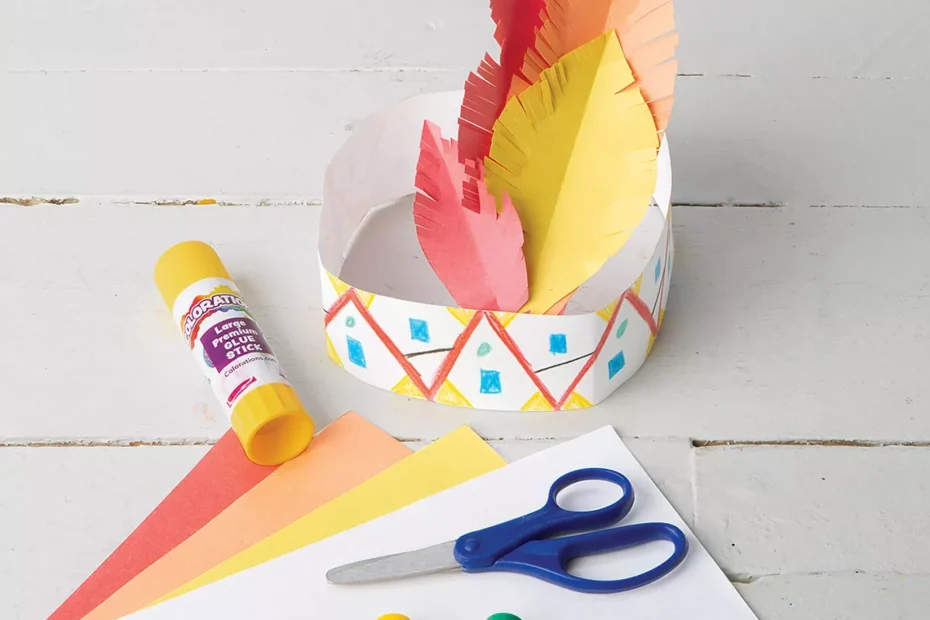
- Cut a headband roughly 3″ wide and 18″ long from a sheet of construction paper.
- Decorate the strip of construction paper to your liking using colored pencils, markers,
sequins and any other collage materials desired. - Cut feather shapes from orange, yellow and red paper construction paper. Cut slits into
the edges for more realistic looking feathers. - Staple the feathers onto the headband, and then staple the two ends of the headband
together.